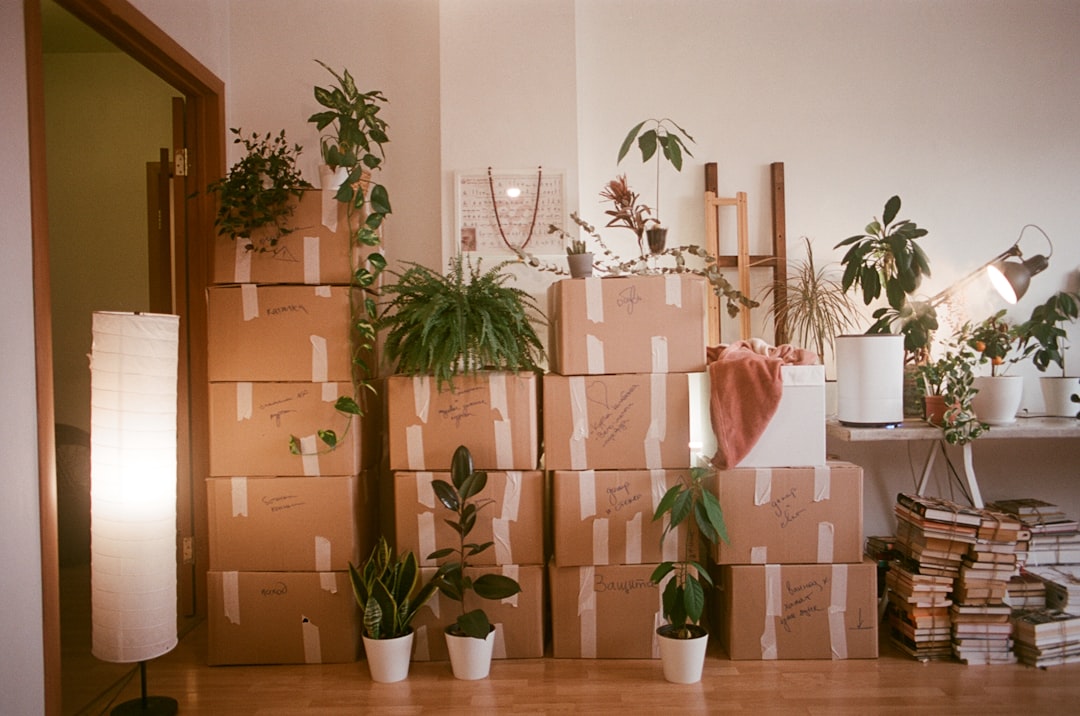
Choosing the right storage unit size starts with an inventory, not a guess. This room-by-room storage unit size guide shows how to measure your belongings, plan stacking and access space, compare common unit sizes, and decide what to keep, donate, sell, or store.
Overview
The answer to “how much storage space do I need?” depends on more than the number of rooms in your home or business. A lightly furnished one-bedroom apartment may fit in a smaller unit than a crowded studio, while bulky furniture, appliances, business equipment, and irregularly shaped items can require additional floor area.
Storage facilities describe units by approximate length and width, such as 5 by 5, 5 by 10, 10 by 10, or 10 by 20 feet. Actual usable capacity can vary because of door placement, ceiling height, support columns, access rules, and the way items are packed. Treat size charts as planning tools rather than guarantees, and confirm dimensions and storage rules with the provider before reserving space.
A useful estimate has three parts:
- Inventory: List everything that will go into storage, including boxes, furniture, equipment, and seasonal items.
- Volume planning: Estimate the floor area and stacking height your inventory requires.
- Access planning: Reserve room to reach important items without unloading the entire unit.
If your contents include wood furniture, electronics, documents, artwork, instruments, or other items affected by temperature or humidity, review whether climate-controlled storage is appropriate before comparing unit sizes.
How to estimate your storage unit size
1. Build a room-by-room inventory
Walk through each room and record large items first. Include dimensions where practical, especially for sofas, mattresses, wardrobes, desks, shelving, appliances, pallets, and machinery. Then estimate the number of boxes by category.
| Area | Items to record | Planning note |
|---|---|---|
| Bedroom | Mattress, bed frame, dresser, wardrobe, boxes | Mattresses can be stored upright only when properly supported and protected. |
| Living room | Sofa, chairs, tables, media equipment, bookcases | Measure bulky seating and note removable legs. |
| Kitchen | Appliances, table, chairs, cabinets, packed boxes | Drain and clean appliances before storage. |
| Garage or utility area | Tools, bicycles, shelving, sports equipment | Irregular shapes often consume more usable space than boxes. |
| Business area | Desks, chairs, files, stock, displays, equipment | Separate frequently retrieved inventory from long-term stock. |
2. Separate bulky items from boxes
Boxes are comparatively easy to stack. Furniture and equipment create the real constraints. Count these items separately and decide whether they can be disassembled safely. Removing table legs, shelving parts, and bed frames may reduce wasted gaps, but label hardware and protect finished surfaces.
For boxes, use a consistent estimate. For example, divide them into small, medium, large, and specialty boxes rather than treating every carton as identical. Heavy books, files, and tools should go in smaller boxes so they can be lifted safely. Clothing, linens, and other lightweight contents can use larger cartons if they remain manageable.
3. Estimate usable volume, then add access space
As a rough planning method, estimate the footprint of each bulky item and group boxes into stackable sections. Do not plan to fill every inch. Leave clearance near the door, keep heavy items low, and create a narrow retrieval route if you expect regular access.
A unit that technically holds everything may still be impractical if you cannot reach the items at the back. For occasional access, a compact layout with a central route may work. For business inventory or a move lasting several months, allow more room for labels, inspection, and retrievals.
4. Compare the estimate with common unit sizes
| Approximate unit size | Typical planning use | Important limitation |
|---|---|---|
| 5 by 5 feet | Boxes, seasonal items, small furnishings, or a limited inventory | Usually unsuitable for multiple large furniture pieces. |
| 5 by 10 feet | Contents from a small room, apartment items, or boxes with a few furnishings | Access space may reduce capacity quickly. |
| 10 by 10 feet | Contents from a modest apartment or several rooms with careful packing | Large sofas, appliances, and assembled shelving can change the estimate. |
| 10 by 15 feet | Larger household contents, renovation storage, or a growing business inventory | Plan the layout before assuming all items will fit. |
| 10 by 20 feet | Contents from a larger home, office equipment, or substantial stock | Verify door access, loading arrangements, and internal dimensions. |
These are general planning categories, not capacity guarantees. Ceiling height can provide useful vertical capacity, but only when the facility permits stacking and the items can be secured safely.
Inputs and assumptions for a better estimate
Stacking and aisle planning
Stack stable, similar-sized boxes together and place heavier cartons below lighter ones. Keep fragile items away from the bottom and avoid leaning unstable loads against walls. Use shelving only if the provider permits it and the shelving can be installed without damaging the unit.
Keep ventilation points, doors, and required clearance areas unobstructed. Do not assume that a tall stack is automatically efficient: unstable piles can create damage and make retrieval difficult. If you will access the unit frequently, plan a route at the start rather than trying to create one after packing.
Access frequency
Classify each item as frequent access, occasional access, or long-term storage. Put frequent-access items near the front, occasional items in the middle, and long-term items at the rear or on higher shelves where appropriate. Businesses should also group inventory by product type, order frequency, or delivery route.
Storage conditions and risk
Clean and dry items before packing. Use suitable covers for upholstered furniture, but avoid sealing moisture inside. Keep boxes off the floor when possible, particularly if the facility recommends pallets or another elevation method. Never store prohibited materials such as hazardous substances, perishables, or anything restricted by the rental agreement.
Unit size is only one part of the decision. Check access hours, loading arrangements, locks, surveillance, moisture controls, and the provider’s responsibility for loss or damage. For household or business contents with meaningful replacement value, read moving insurance and valuation coverage guidance before moving items into storage.
Room-by-room inventory worksheet
Copy this structure into a note or spreadsheet:
- Room or department: Identify the source of the items.
- Large items: Record the item, dimensions, and whether it can be disassembled.
- Boxes: Record quantity, size, weight, and contents.
- Access level: Frequent, occasional, or long-term.
- Condition needs: Note whether the item may need climate-controlled storage.
- Disposition: Store, sell, donate, recycle, or discard.
- Location code: Assign a shelf, row, or box number for later retrieval.
Worked examples
Example 1: One-bedroom household during a move
Suppose the inventory includes a bed frame and mattress, dresser, sofa, coffee table, small dining table, four chairs, several appliances, and approximately 30 medium boxes. Disassembling the bed and table, protecting the sofa, and stacking stable boxes may make a medium-sized unit workable. However, if the household also has a large wardrobe, exercise equipment, or frequent access needs, moving up one size may create a safer and more usable layout.
Example 2: Renovation storage
A household storing living-room furniture, kitchen contents, and packed boxes during a renovation should first separate items needed during the project from items that can remain untouched. The accessible group should be placed near the door. Furniture covers, labeled boxes, and a simple location map can reduce repeated handling. The best unit is the smallest one that leaves a practical route and protects the contents from being crushed or buried.
For more planning detail, see this guide to temporary storage during a home renovation.
Example 3: Small business inventory
A business may have cartons of stock, display materials, spare equipment, and records. Counting cartons alone can produce an unreliable estimate because retrievals matter. Group items by product or workflow, use consistent labels, and reserve space near the entrance for outgoing orders. If deliveries or scheduled retrievals are part of the plan, compare storage capacity with the business’s access and transport workflow. The guide to business storage access planning can help organize those requests.
Downsizing decision checklist
Before paying for a larger unit, ask:
- Have I removed items that are damaged, duplicated, or no longer useful?
- Can any furniture be disassembled without creating damage or loss of function?
- Are boxes uniform enough to stack safely?
- Do I need access to the rear of the unit?
- Could shelving improve retrieval without reducing usable space?
- Would a smaller unit work if I sell, donate, or digitize selected contents?
- Am I storing an item whose replacement cost is lower than several months of storage?
When to recalculate your storage needs
Revisit your estimate whenever the inventory or the way you use the unit changes. Recalculate before signing a new rental term, adding furniture, receiving a business shipment, or combining contents from another location. A unit that worked during a move may become inefficient once you begin retrieving boxes regularly.
Review the layout at least whenever you add a substantial group of items. Take a current inventory, identify unused space, and check whether heavy or fragile items remain safely positioned. If the unit is nearly full, do not simply compress the contents: compare the cost and convenience of a larger unit with the cost of repacking, disposing of unnecessary items, or moving selected inventory elsewhere.
Use this final process before reserving or changing a unit:
- Complete the room-by-room inventory.
- Measure the largest and least stackable items.
- Count and categorize boxes.
- Mark frequent-access items.
- Choose a tentative unit size using the comparison table.
- Sketch the loading order and retrieval route.
- Confirm actual dimensions, access rules, stacking limits, and prohibited items with the provider.
- Recalculate whenever your inventory, access frequency, or storage term changes.
That approach turns a rough storage guess into a repeatable plan. It can help households avoid paying for unused capacity and help businesses create storage that remains organized as inventory changes.